Create A Custom Select Menu in HTML CSS & JavaScript
by Letscode - October 4,2023
Hey friends, today in this blog, you’ll learn how to create a Custom Select Menu in HTML CSS & JavaScript. In the earlier blog, I have shared how to create a Custom Right-Click Context Menu in JavaScript, and now it’s time to create a custom select dropdown menu.
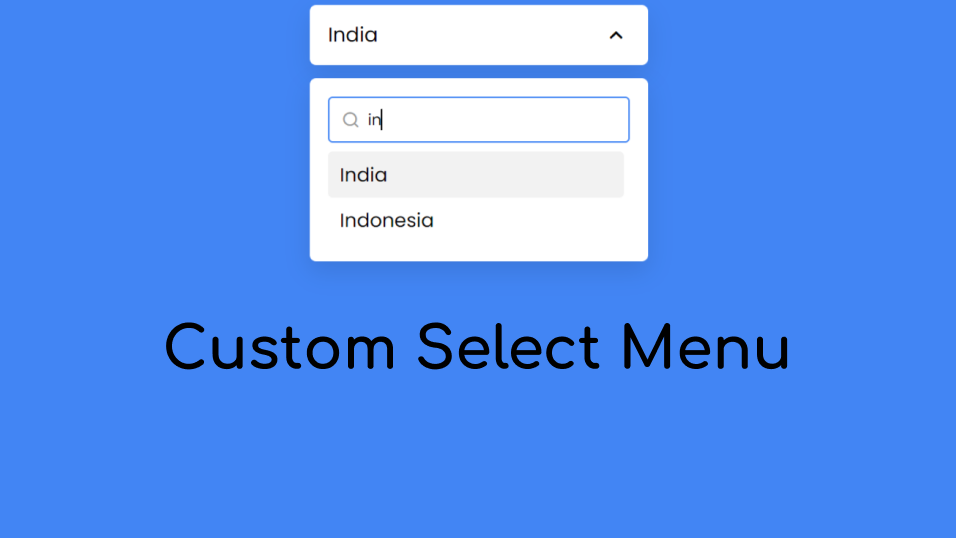
The custom select menu is a dropdown menu that allows users to choose or select one option from many predefined options. In my select menu, as you can see in the preview image, there is a custom select menu with a search box.
Custom Select Menu in JavaScript [Source Codes]
To create this Custom Select Menu in JavaScript. First, you need to create three Files: HTML, CSS & JavaScript File. After creating these files just paste the given codes into your file. You can also download the source code files of this select menu from the below download button.
First, create an HTML file with the name of index.html and paste the given codes into your HTML file. Remember, you’ve to create a file with .html extension.
<!DOCTYPE html>
<!-- Coding By Letscodeweb - youtube.com/@Letscodeweb -->
<html lang="en" dir="ltr">

<head>
    <meta charset="utf-8">
    <title>Custom Select Menu | Letscodeweb</title>
    <link rel="stylesheet" href="style.css">
    <meta name="viewport" content="width=device-width, initial-scale=1.0">
    <!-- Iconscout Link For Icons -->
    <link rel="stylesheet" href="https://unicons.iconscout.com/release/v4.0.0/css/line.css">
</head>

<body>
    <div class="wrapper">
        <div class="select-btn">
            <span>Select Country</span>
            <i class="uil uil-angle-down"></i>
        </div>
        <div class="content">
            <div class="search">
                <i class="uil uil-search"></i>
                <input spellcheck="false" type="text" placeholder="Search">
            </div>
            <ul class="options"></ul>
        </div>
    </div>

    <script src="script.js"></script>

</body>

</html>
Second, paste the following codes into your style.css file.
/* Import Google Font - Poppins */
@import url('https://fonts.googleapis.com/css2?family=Poppins:wght@400;500;600;700&display=swap');

* {
  margin: 0;
  padding: 0;
  box-sizing: border-box;
  font-family: 'Poppins', sans-serif;
}

body {
  background: #4285f4;
}

::selection {
  color: #fff;
  background: #4285f4;
}

.wrapper {
  width: 370px;
  margin: 85px auto 0;
}

.select-btn,
li {
  display: flex;
  align-items: center;
  cursor: pointer;
}

.select-btn {
  height: 65px;
  padding: 0 20px;
  font-size: 22px;
  background: #fff;
  border-radius: 7px;
  justify-content: space-between;
  box-shadow: 0 10px 25px rgba(0, 0, 0, 0.1);
}

.select-btn i {
  font-size: 31px;
  transition: transform 0.3s linear;
}

.wrapper.active .select-btn i {
  transform: rotate(-180deg);
}

.content {
  display: none;
  padding: 20px;
  margin-top: 15px;
  background: #fff;
  border-radius: 7px;
  box-shadow: 0 10px 25px rgba(0, 0, 0, 0.1);
}

.wrapper.active .content {
  display: block;
}

.content .search {
  position: relative;
}

.search i {
  top: 50%;
  left: 15px;
  color: #999;
  font-size: 20px;
  pointer-events: none;
  transform: translateY(-50%);
  position: absolute;
}

.search input {
  height: 50px;
  width: 100%;
  outline: none;
  font-size: 17px;
  border-radius: 5px;
  padding: 0 20px 0 43px;
  border: 1px solid #B3B3B3;
}

.search input:focus {
  padding-left: 42px;
  border: 2px solid #4285f4;
}

.search input::placeholder {
  color: #bfbfbf;
}

.content .options {
  margin-top: 10px;
  max-height: 250px;
  overflow-y: auto;
  padding-right: 7px;
}

.options::-webkit-scrollbar {
  width: 7px;
}

.options::-webkit-scrollbar-track {
  background: #f1f1f1;
  border-radius: 25px;
}

.options::-webkit-scrollbar-thumb {
  background: #ccc;
  border-radius: 25px;
}

.options::-webkit-scrollbar-thumb:hover {
  background: #b3b3b3;
}

.options li {
  height: 50px;
  padding: 0 13px;
  font-size: 21px;
}

.options li:hover,
li.selected {
  border-radius: 5px;
  background: #f2f2f2;
}
Third, paste the following codes into your script.js file.
const wrapper = document.querySelector(".wrapper"),
selectBtn = wrapper.querySelector(".select-btn"),
searchInp = wrapper.querySelector("input"),
options = wrapper.querySelector(".options");
let countries = ["Afghanistan", "Algeria", "Argentina", "Australia", "Bangladesh", "Belgium", "Bhutan",
"Brazil", "Canada", "China", "Denmark", "Ethiopia", "Finland", "France", "Germany",
"Hungary", "Iceland", "India", "Indonesia", "Iran", "Italy", "Japan", "Malaysia",
"Maldives", "Mexico", "Morocco", "Nepal", "Netherlands", "Nigeria", "Norway", "Pakistan",
"Peru", "Russia", "Romania", "South Africa", "Spain", "Sri Lanka", "Sweden", "Switzerland",
"Thailand", "Turkey", "Uganda", "Ukraine", "United States", "United Kingdom", "Vietnam"];
function addCountry(selectedCountry) {
options.innerHTML = "";
countries.forEach(country => {
let isSelected = country == selectedCountry ? "selected" : "";
let li = `<li onclick="updateName(this)" class="${isSelected}">${country}</li>`;
options.insertAdjacentHTML("beforeend", li);
});
}
addCountry();
function updateName(selectedLi) {
searchInp.value = "";
addCountry(selectedLi.innerText);
wrapper.classList.remove("active");
selectBtn.firstElementChild.innerText = selectedLi.innerText;
}
searchInp.addEventListener("keyup", () => {
let arr = [];
let searchWord = searchInp.value.toLowerCase();
arr = countries.filter(data => {
return data.toLowerCase().startsWith(searchWord);
}).map(data => {
let isSelected = data == selectBtn.firstElementChild.innerText ? "selected" : "";
return `<li onclick="updateName(this)" class="${isSelected}">${data}</li>`;
}).join("");
options.innerHTML = arr ? arr : `Oops! Country not found
`;
});
selectBtn.addEventListener("click", () => wrapper.classList.toggle("active"));
That’s all, now you’ve successfully created a Custom Select Menu with Search Box in HTML CSS & JavaScript. If your code doesn’t work or you’ve faced any problem, please download the source code files from the given download button. It’s free and a .zip file will be downloaded then you’ve to extract it.

Most Popular


Recent Posts
-

Image Slider in HTML CSS and JavaScript
Letscode - October 4,2023
-

Facebook Login Page Using HTML & CSS
Letscode - October 10,2023
-

Amazon Website clone in HTML & CSS
Letscode - November 4,2023
-

Custom Captcha Generator in HTML CSS and JS
Letscode - October 24,2023