Drag & Drop in HTML CSS & JavaScript
by Letscode - October 4,2023
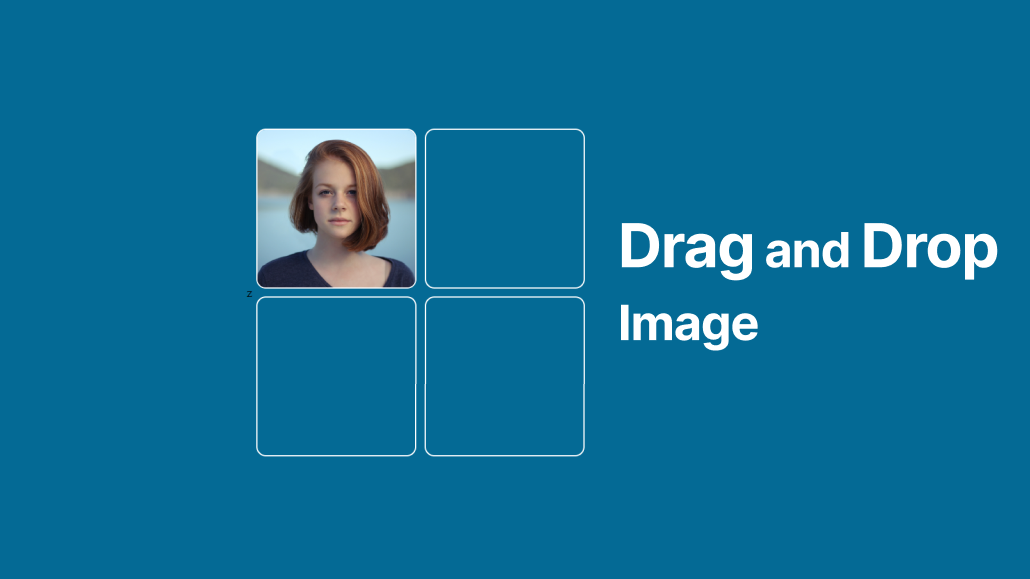
Creating a drag-and-drop functionality can be a great project to improve your skills in HTML, CSS, and JavaScript. Moreover, drag-and-drop interfaces are widely used in modern web applications, and having the ability to create one from scratch can be very beneficial for your future projects.
Drag and Drop is the interaction that can be used to rearrange items within a list, move items from one list to another, or even manipulate the position of elements on a page by using a mouse.
Steps to create Drag & Drop in HTML CSS & JavaScript
To create a Drag & Drop using HTML, CSS, and vanilla JavaScript, follow the given steps line by line:
- Create a folder. You can name this folder whatever you want, and inside this folder, create the mentioned files.
- Create an index.html file. The file name must be index and its extension .html
- Create a style.css file. The file name must be style and its extension .css
- Create a script.js file. The file name must be script and its extension .js
To start, add the following HTML codes to your index.html file to create the basic layout of the project.
<!DOCTYPE html>
<!-- Coding by Letscodeweb  -->
<html lang="en">

<head>
    <meta charset="UTF-8" />
    <meta name="description"
        content="Today in this blog you will learn how to Drag & Drop elements from one position to another by using HTML CSS & JavaScript. At the end of this blog post, you will a project that has drag-and-drop functionality with some animations." />
    <meta name="keywords"
        content="drag drop html,drag drop html css javascript,drag drop javascript,drag drop js,draggable HTML and CSS,HTML, CSS, JavaScript " />
    <meta name="viewport" content="width=device-width, initial-scale=1.0" />
    <title>Drag & Drop in JavaScript | Letscodeweb</title>
    <link rel="stylesheet" href="style.css" />
    <link rel="stylesheet" href="../custom-styles.css" />
    <script src="../custom-scripts.js" defer></script>
    </style>
</head>

<body>
    <section class="container">
        <div class="box">
            <div class="image" draggable="true"></div>
        </div>
        <div class="box"></div>
        <div class="box"></div>
        <div class="box"></div>
    </section>
    <script src="script.js"></script>
</body>

</html>
Second, paste the following codes into your style.css file.
* {
  margin: 0;
  padding: 0;
  box-sizing: border-box;
}

body {
  height: 100vh;
  display: flex;
  align-items: center;
  justify-content: center;
  background: #046a95;
}

.container {
  display: flex;
  gap: 10px;
  flex-wrap: wrap;
  width: 420px;
  justify-content: center;
}

.container .box {
  position: relative;
  height: 200px;
  width: 200px;
  border-radius: 12px;
  border: 2px solid #fff;
}

.box .image {
  height: 100%;
  width: 100%;
  border-radius: 10px;
  background-size: cover;
  background-position: center;
  background-image: url("img.jpg");
}

.box.hovered {
  border: 2px dashed #333;
}
Third, paste the following codes into your script.js file.
//DOM Elements
const boxes = document.querySelectorAll(".box"),
  image = document.querySelector(".image");

//Loop through each boxes element
boxes.forEach((box) => {
  //When a draggable element dragged over a box element
  box.addEventListener("dragover", (e) => {
    e.preventDefault(); //Prevent default behaviour
    box.classList.add("hovered");
  });

  //When a draggable element leaves box element
  box.addEventListener("dragleave", () => {
    box.classList.remove("hovered");
  });

  //When a draggable element is dropped on a box elemen
  box.addEventListener("drop", () => {
    box.appendChild(image);
    box.classList.remove("hovered");
  });
});
Conclusion and Final Words
By following the steps in this blog post, you have successfully created a drag-and-drop using HTML, CSS, and JavaScript. Now it’s up to you to experiment with the code and make it more useful. If you face any difficulties while creating your Drag and Drop or your code is not working as expected, you can download the source code files for this Drag and Drop for free by clicking on the download button, and you can also view a live demo of this card slider by clicking on the view live button.

Most Popular


Recent Posts
-

Image Slider in HTML CSS and JavaScript
Letscode - October 4,2023
-

Facebook Login Page Using HTML & CSS
Letscode - October 10,2023
-

Amazon Website clone in HTML & CSS
Letscode - November 4,2023
-

Custom Captcha Generator in HTML CSS and JS
Letscode - October 24,2023