Rock Paper Scissors Game in HTML CSS & JavaScript
by Letscode - October 4,2023
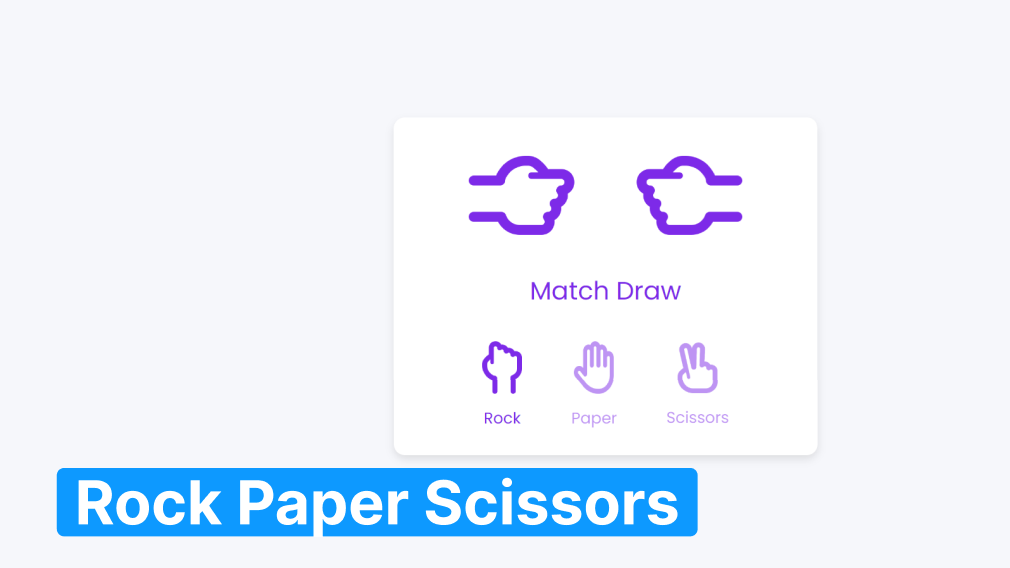
At least once in your life, you must have played the rock-paper-scissors game. Have you ever considered creating a rock-paper-scissors game using HTML, CSS, and Javascript?
Today in this blog, you will learn how to create a rock-paper-scissors game using HTML, CSS, and JavaScript. By the end, you will not only have a functional game, but you will also acquire an understanding of the game’s logic, error handling, and other related aspects. Recently I have provided a Number Guessing Game as well, I hope that it is also beneficial for you.
Steps for creating Rock-Paper-Scissors Game
To create a Rock-Paper-Scissors Game using HTML, CSS, and vanilla JavaScript, follow the given steps line by line:
- Create a folder. You can name this folder whatever you want, and inside this folder, create the mentioned files.
- Create an index.html file. The file name must be index and its extension .html
- Create a style.css file. The file name must be style and its extension .css
- Create a script.js file. The file name must be script and its extension .js
Once you create these files, paste the given codes into the specified files. If you don’t want to do these then scroll down and download all the source code files of the Rock-Paper-Scissors Game, by clicking on the given download button.
First, paste the following codes into your index.html file.
<!DOCTYPE html>
<!-- Coding By Letscodeweb  -->
<html lang="en">

<head>
    <meta charset="UTF-8" />
    <meta http-equiv="X-UA-Compatible" content="IE=edge" />
    <meta name="viewport" content="width=device-width, initial-scale=1.0" />
    <title>JavaScript Game | Rock Paper Scissors</title>
    <link rel="stylesheet" href="style.css" />
</head>

<body>
    <section class="container">
        <div class="result_field">
            <div class="result_images">
                <span class="user_result">
                    <img src="images/rock.png" alt="" />
                </span>
                <span class="cpu_result">
                    <img src="images/rock.png" alt="" />
                </span>
            </div>
            <div class="result">Let's Play!!</div>
        </div>

        <div class="option_images">
            <span class="option_image">
                <img src="images/rock.png" alt="" />
                <p>Rock</p>
            </span>
            <span class="option_image">
                <img src="images/paper.png" alt="" />
                <p>Paper</p>
            </span>
            <span class="option_image">
                <img src="images/scissors.png" alt="" />
                <p>Scissors</p>
            </span>
        </div>
    </section>

    <script src="script.js" defer></script>
</body>

</html>
Second, paste the following codes into your style.css file.
/* Import Google font - Poppins */
@import url("https://fonts.googleapis.com/css2?family=Poppins:wght@200;300;400;500;600;700&display=swap");

* {
  margin: 0;
  padding: 0;
  box-sizing: border-box;
  font-family: "Poppins", sans-serif;
}

body {
  height: 100vh;
  display: flex;
  align-items: center;
  justify-content: center;
  background: #f6f7fb;
}

::selection {
  color: #fff;
  background-color: #7d2ae8;
}

.container {
  padding: 2rem 7rem;
  border-radius: 14px;
  background: #fff;
  box-shadow: 0 5px 10px rgba(0, 0, 0, 0.1);
}

.result_images {
  display: flex;
  column-gap: 7rem;
}

.container.start .user_result {
  transform-origin: left;
  animation: userShake 0.7s ease infinite;
}

@keyframes userShake {
  50% {
    transform: rotate(10deg);
  }
}

.container.start .cpu_result {
  transform-origin: right;
  animation: cpuShake 0.7s ease infinite;
}

@keyframes cpuShake {
  50% {
    transform: rotate(-10deg);
  }
}

.result_images img {
  width: 100px;
}

.user_result img {
  transform: rotate(90deg);
}

.cpu_result img {
  transform: rotate(-90deg) rotateY(180deg);
}

.result {
  text-align: center;
  font-size: 2rem;
  color: #7d2ae8;
  margin-top: 1.5rem;
}

.option_image img {
  width: 50px;
}

.option_images {
  display: flex;
  align-items: center;
  margin-top: 2.5rem;
  justify-content: space-between;
}

.container.start .option_images {
  pointer-events: none;
}

.option_image {
  display: flex;
  flex-direction: column;
  align-items: center;
  opacity: 0.5;
  cursor: pointer;
  transition: opacity 0.3s ease;
}

.option_image:hover {
  opacity: 1;
}

.option_image.active {
  opacity: 1;
}

.option_image img {
  pointer-events: none;
}

.option_image p {
  color: #7d2ae8;
  font-size: 1.235rem;
  margin-top: 1rem;
  pointer-events: none;
}
Third, paste the following codes into your script.js file.
// Get  to DOM elements
const gameContainer = document.querySelector(".container"),
  userResult = document.querySelector(".user_result img"),
  cpuResult = document.querySelector(".cpu_result img"),
  result = document.querySelector(".result"),
  optionImages = document.querySelectorAll(".option_image");

// Loop through each option image element
optionImages.forEach((image, index) => {
  image.addEventListener("click", (e) => {
    image.classList.add("active");

    userResult.src = cpuResult.src = "images/rock.png";
    result.textContent = "Wait...";

    // Loop through each option image again
    optionImages.forEach((image2, index2) => {
      // If the current index doesn't match the clicked index
      // Remove the "active" class from the other option images
      index !== index2 && image2.classList.remove("active");
    });

    gameContainer.classList.add("start");

    // Set a timeout to delay the result calculation
    let time = setTimeout(() => {
      gameContainer.classList.remove("start");

      // Get the source of the clicked option image
      let imageSrc = e.target.querySelector("img").src;
      // Set the user image to the clicked option image
      userResult.src = imageSrc;

      // Generate a random number between 0 and 2
      let randomNumber = Math.floor(Math.random() * 3);
      // Create an array of CPU image options
      let cpuImages = ["images/rock.png", "images/paper.png", "images/scissors.png"];
      // Set the CPU image to a random option from the array
      cpuResult.src = cpuImages[randomNumber];

      // Assign a letter value to the CPU option (R for rock, P for paper, S for scissors)
      let cpuValue = ["R", "P", "S"][randomNumber];
      // Assign a letter value to the clicked option (based on index)
      let userValue = ["R", "P", "S"][index];

      // Create an object with all possible outcomes
      let outcomes = {
        RR: "Draw",
        RP: "Cpu",
        RS: "User",
        PP: "Draw",
        PR: "User",
        PS: "Cpu",
        SS: "Draw",
        SR: "Cpu",
        SP: "User",
      };

      // Look up the outcome value based on user and CPU options
      let outComeValue = outcomes[userValue + cpuValue];

      // Display the result
      result.textContent = userValue === cpuValue ? "Match Draw" : `${outComeValue} Won!!`;
    }, 2500);
  });
});
If you face any difficulties while creating your Rock Paper Scissors Game or your code is not working as expected, you can download the source code files for this Rock Paper Scissors Game for free by clicking on the download button, and you can also view a live demo of this card slider by clicking on the view live button.

Most Popular


Recent Posts
-

Image Slider in HTML CSS and JavaScript
Letscode - October 4,2023
-

Facebook Login Page Using HTML & CSS
Letscode - October 10,2023
-

Amazon Website clone in HTML & CSS
Letscode - November 4,2023
-

Custom Captcha Generator in HTML CSS and JS
Letscode - October 24,2023