How to Create A Snake Game in HTML CSS & JavaScript
by Letscode - October 4,2023
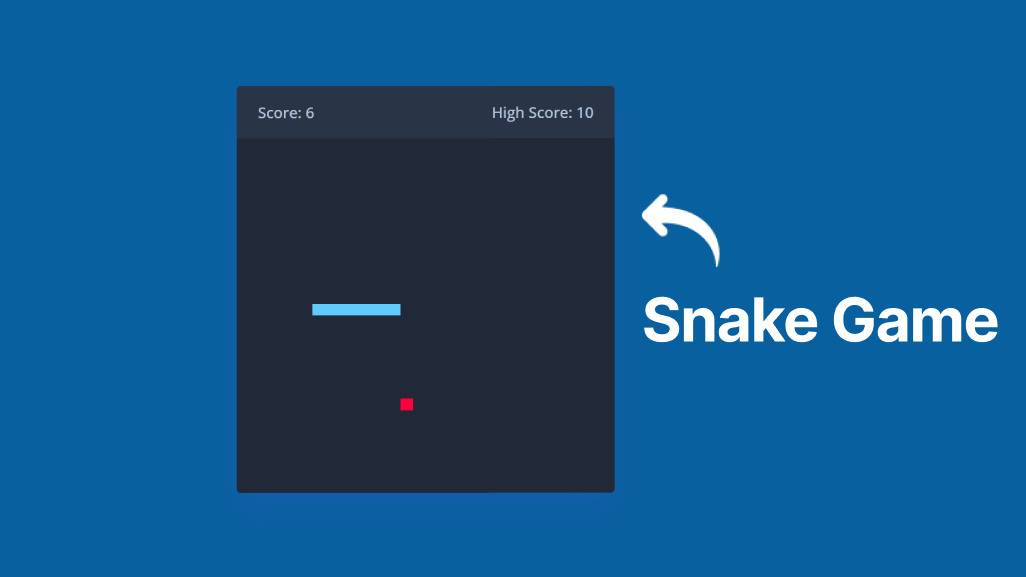
Snake is a classic game that millions of people have played. Have you ever thought about creating your own Snake Game? Creating a Snake Game using HTML, CSS, and vanilla JavaScript is a fun and educational project that can improve your web development skills.
In this blog post, I’ll guide you through the steps of creating your own Snake Game from scratch. You can play this game on a PC using keyboard arrow keys or on a mobile device using touch-based arrow buttons.
If you’re excited to see how this snake game looks and works, click here to play it. For a full video tutorial on creating a snake game using HTML, CSS, and JavaScript, you can watch the given YouTube video.
Steps For Creating Snake Game in JavaScript
To create a snake game using HTML, CSS, and JavaScript, follow the given steps line by line:
- Create a folder. You can name this folder whatever you want, and inside this folder, create the mentioned files.
- Create an index.html file. The file name must be index and its extension .html
- Create a style.css file. The file name must be style and its extension .css
- Create a script.js file. The file name must be script and its extension .js
To start, add the following HTML codes to your index.html file to create the game’s basic layout. The “play-board” container is empty now, but it will be filled with snake bodies and food elements later using JavaScript code.
First, paste the following codes into your index.html file.
<!DOCTYPE html>
<!-- Coding By Letscodeweb - youtube.com/@Letscodeweb -->
<html lang="en" dir="ltr">

<head>
    <meta charset="utf-8">
    <title>Snake Game JavaScript | Letscodeweb</title>
    <link rel="stylesheet" href="style.css">
    <meta name="viewport" content="width=device-width, initial-scale=1.0">
    <link rel="stylesheet" href="https://cdnjs.cloudflare.com/ajax/libs/font-awesome/6.3.0/css/all.min.css">
    <script src="script.js" defer></script>
</head>

<body>
    <div class="wrapper">
        <div class="game-details">
            <span class="score">Score: 0</span>
            <span class="high-score">High Score: 0</span>
        </div>
        <div class="play-board"></div>
        <div class="controls">
            <i data-key="ArrowLeft" class="fa-solid fa-arrow-left-long"></i>
            <i data-key="ArrowUp" class="fa-solid fa-arrow-up-long"></i>
            <i data-key="ArrowRight" class="fa-solid fa-arrow-right-long"></i>
            <i data-key="ArrowDown" class="fa-solid fa-arrow-down-long"></i>
        </div>
    </div>

</body>

</html>
Second, paste the following codes into your style.css file.
/* Import Google font */
@import url('https://fonts.googleapis.com/css2?family=Open+Sans:wght@400;500;600;700&display=swap');

* {
  margin: 0;
  padding: 0;
  box-sizing: border-box;
  font-family: 'Open Sans', sans-serif;
}

body {
  display: flex;
  align-items: center;
  justify-content: center;
  min-height: 100vh;
  background: #09609e;
}

.wrapper {
  width: 65vmin;
  height: 70vmin;
  display: flex;
  overflow: hidden;
  flex-direction: column;
  justify-content: center;
  border-radius: 5px;
  background: #293447;
  box-shadow: 0 20px 40px rgba(52, 87, 220, 0.2);
}

.game-details {
  color: #B8C6DC;
  font-weight: 500;
  font-size: 1.2rem;
  padding: 20px 27px;
  display: flex;
  justify-content: space-between;
}

.play-board {
  height: 100%;
  width: 100%;
  display: grid;
  background: #212837;
  grid-template: repeat(30, 1fr) / repeat(30, 1fr);
}

.play-board .food {
  background: #FF003D;
}

.play-board .head {
  background: #60CBFF;
}

.controls {
  display: none;
  justify-content: space-between;
}

.controls i {
  padding: 25px 0;
  text-align: center;
  font-size: 1.3rem;
  color: #B8C6DC;
  width: calc(100% / 4);
  cursor: pointer;
  border-right: 1px solid #171B26;
}

@media screen and (max-width: 800px) {
  .wrapper {
    width: 90vmin;
    height: 115vmin;
  }

  .game-details {
    font-size: 1rem;
    padding: 15px 27px;
  }

  .controls {
    display: flex;
  }

  .controls i {
    padding: 15px 0;
    font-size: 1rem;
  }
}
Third, paste the following codes into your script.js file.
const playBoard = document.querySelector(".play-board");
const scoreElement = document.querySelector(".score");
const highScoreElement = document.querySelector(".high-score");
const controls = document.querySelectorAll(".controls i");

let gameOver = false;
let foodX, foodY;
let snakeX = 5, snakeY = 5;
let velocityX = 0, velocityY = 0;
let snakeBody = [];
let setIntervalId;
let score = 0;

// Getting high score from the local storage
let highScore = localStorage.getItem("high-score") || 0;
highScoreElement.innerText = `High Score: ${highScore}`;

const updateFoodPosition = () => {
    // Passing a random 1 - 30 value as food position
    foodX = Math.floor(Math.random() * 30) + 1;
    foodY = Math.floor(Math.random() * 30) + 1;
}

const handleGameOver = () => {
    // Clearing the timer and reloading the page on game over
    clearInterval(setIntervalId);
    alert("Game Over! Press OK to replay...");
    location.reload();
}

const changeDirection = e => {
    // Changing velocity value based on key press
    if (e.key === "ArrowUp" && velocityY != 1) {
        velocityX = 0;
        velocityY = -1;
    } else if (e.key === "ArrowDown" && velocityY != -1) {
        velocityX = 0;
        velocityY = 1;
    } else if (e.key === "ArrowLeft" && velocityX != 1) {
        velocityX = -1;
        velocityY = 0;
    } else if (e.key === "ArrowRight" && velocityX != -1) {
        velocityX = 1;
        velocityY = 0;
    }
}

// Calling changeDirection on each key click and passing key dataset value as an object
controls.forEach(button => button.addEventListener("click", () => changeDirection({ key: button.dataset.key })));

const initGame = () => {
    if (gameOver) return handleGameOver();
    let html = `<div class="food" style="grid-area: ${foodY} / ${foodX}"></div>`;

    // Checking if the snake hit the food
    if (snakeX === foodX && snakeY === foodY) {
        updateFoodPosition();
        snakeBody.push([foodY, foodX]); // Pushing food position to snake body array
        score++; // increment score by 1
        highScore = score >= highScore ? score : highScore;
        localStorage.setItem("high-score", highScore);
        scoreElement.innerText = `Score: ${score}`;
        highScoreElement.innerText = `High Score: ${highScore}`;
    }
    // Updating the snake's head position based on the current velocity
    snakeX += velocityX;
    snakeY += velocityY;

    // Shifting forward the values of the elements in the snake body by one
    for (let i = snakeBody.length - 1; i > 0; i--) {
        snakeBody[i] = snakeBody[i - 1];
    }
    snakeBody[0] = [snakeX, snakeY]; // Setting first element of snake body to current snake position

    // Checking if the snake's head is out of wall, if so setting gameOver to true
    if (snakeX <= 0 || snakeX > 30 || snakeY <= 0 || snakeY > 30) {
        return gameOver = true;
    }

    for (let i = 0; i < snakeBody.length; i++) {
        // Adding a div for each part of the snake's body
        html += `<div class="head" style="grid-area:${snakeBody[i][1]} / ${snakeBody[i][0]}"></div>`;
        // Checking if the snake head hit the body, if so set gameOver to true
        if (i !== 0 && snakeBody[0][1] === snakeBody[i][1] && snakeBody[0][0] === snakeBody[i][0]) {
            gameOver = true;
        }
    }
    playBoard.innerHTML = html;
}

updateFoodPosition();
setIntervalId = setInterval(initGame, 100);
document.addEventListener("keyup", changeDirection);
In the code, you can see that the current speed of the snake is 100 milliseconds, which determines how quickly the snake moves on the game board. You can easily adjust this speed by changing the value in the “setInterval” function at the bottom of the code.
To understand the code more deeply, you can watch the above YouTube video tutorial or read the comments within the code and experiment with it.
Conclusion and FinalWords
By following the steps in this blog post, you have successfully created a classic snake game using HTML, CSS, and JavaScript which you can play on any device browser. I hope this snake game project helps you understand DOM manipulation, problem-solving skills, and other web development skills.
If you enjoyed creating your Snake Game and learned something new, you can check out my other JavaScript Games such as Quiz, Memory Card, Tic Tac Toe, and many more. These games are not only enjoyable to create but also provide an excellent opportunity to practice and enhance your JavaScript skills.
If you encounter any problems or your code is not working as expected, you can download the source code files of this Snake Game project by clicking on the given download button. It’s free, and a zip file containing the project folder with source code files will be downloaded.

Most Popular


Recent Posts
-

Image Slider in HTML CSS and JavaScript
Letscode - October 4,2023
-

Facebook Login Page Using HTML & CSS
Letscode - October 10,2023
-

Amazon Website clone in HTML & CSS
Letscode - November 4,2023
-

Custom Captcha Generator in HTML CSS and JS
Letscode - October 24,2023